10. Mastering Baking
Let's talk a bit about Mixed Lighting!
Much like the Realtime Lighting section, the Mixed section is pretty light with regards to options. We have the option to enable or disable Baked Global Illumination. If we enable Baked Global Illumination, we then can choose a Lighting Mode and a Realtime Shadow Color.
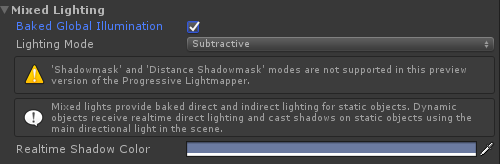
Remember the Mixed Lighting Mode? This Lighting Mode property lets us specifically control how Mixed Lights behave once we bake them. There are 3 main modes:
- Subtractive
- Shadowmask
- Baked Indirect
Since we are not using mixed lights, we will be skipping this panel for now. But if you want more information on what each mode does, feel free to read the information boxes in the panel for each mode and also the Unity documentation on it.
Just make sure you have Baked Global Illumination enabled, and let's continue onto the Lightmapping Settings.
Currently in Unity, there is support for two types of Lightmapping Algorithms:
- Enlighten
- Progressive
Enlighten was Unity's primary lighting system up until Unity 5.6. In that version, they added the Progressive Lightmapper.
Moving forward, Unity will be continuing to upgrade the Progressive Lightmapper as it offers some extra benefits such as eventually being able to run on the GPU and faster previewing of your scene.
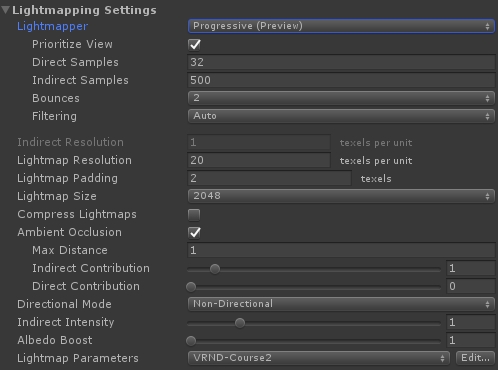
As such, we will be focusing on using the Progressive Lightmapper, so make sure you have that selected.
With it, you get a few options additional options to select.
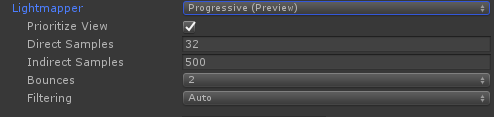
You can use the "prioritize view" option to prioritize lightmapping some areas of your scene over others based on where you are looking in your scene. However if you do not care about this, it is best to turn that off.
You also have several settings that control the the fidelity of your light mapping process, specifically:
- Direct Samples
- Indirect Samples
- Bounces
- Filtering
The way Light Mapping works at a high level is that for each light, you will be shooting rays of light in various directions depending on the type of light. If these rays hit an object, we then calculate how the light should look at that position based on the object and its material. If we want to simulate indirect light, we can then have a ray "bounce" off that object and continue the same process. All those settings above control how many rays (samples) are produced and how much they bounce. So the higher the values, the higher quality you will get but the longer it will take to lightmap.
Lightmap Texture Properties
After the Lightmapper specific settings, we will see that we have a few settings for the resolution of your light maps. We want to set this value high enough so that the resolution of our lighting is good, but not too high that we run into performance issues. Let’s set the Lightmap Resolution to 20.

The next property is the Padding, which is the separation between all the baked calculations we do for every object. Currently, it is set 2. If you go the lightmaps tab, and look very closely you might be able to see some small spacing in between each images. In general, we want to keep the spacing small so as to take up less space, which again is really important on mobile for efficiency. In general you would only want to change this to be higher if you want to move the optimize where certain objects are in your lightmap. Let’s go ahead and set it back down to 2.
We also have Ambient Occlusion, which is a property that lets us control how ambient light bounces off and gets occluded by static meshes. The property becomes most apparent near the intersection of meshes like the wall of our apartment.
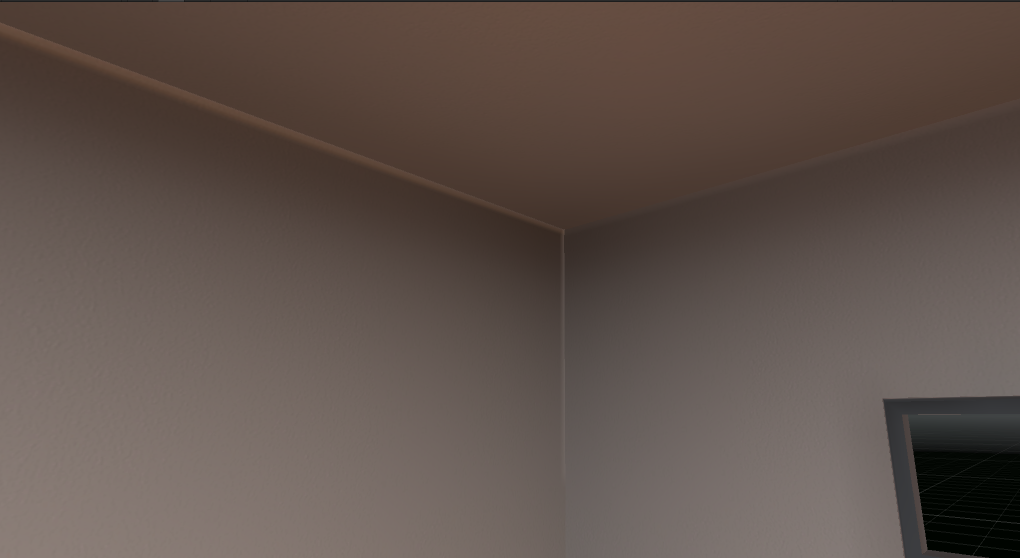
To really see the effect, try increasing the Max Distance property to 10 and see if there is a difference. Reminder, you will need to re-generate your lightmaps.
The last property to discuss is the Atlas Size. This property lets us control the actual size of the light map texture. If we look at the choices, you will notice that they are all powers of 2 and this is purely so that Unity can perform some optimizations when it uses the Atlas. If this value is too small, it will result in creating many small light map textures, which is not optimal. Too big, and we will be wasting space in our map.
Just to see what happens, try setting the Atlas size to 128 to and see how many lightmaps are created in the Global Maps tab.
It just so happens that 1024 is the smallest size that captures all our lighting data into one texture, so set it back to 1024 and bake it again.
And that covers the lighting panel! There is a lot more we could talk about, but we have cover all we need in this panel to make our lights amazing. We only have one more window we need to look at to up the quality of our lights!
Project Preview:

Tip: Notice that the project rubric wants you to try a couple of different settings? There's not really a one size fits all setting for lightmaps and baked lighting. This is because every app is different. The expectation is that the project should work and look good with a resolution set to 80. If yours is different, be sure to explain why and what you tried.